Chod Rig
Tackle Required:
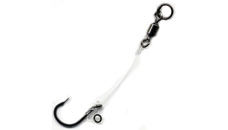
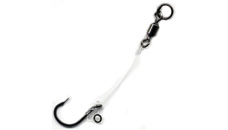
Chod Hooks |
Sizes 4 to 8 can be used depending on the size of the Pop-Up. Always test your baits in shallow water before casting out to make sure that the correct buoyancy is obtained. Gardner Chod Hooks are a great choice. |
|
|
A stiff link Mono or Bristle Filament. |
15-20lb Breaking strain. |
|
|
Stop Beads |
Must be able to slide over the Leadcore withou moving freely. Is used to keep your Chod Rigs from moving around too much. |
|
|
Leadcore |
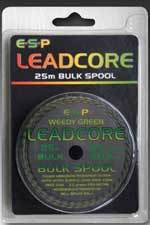
45lb Breaking strain. ESP's leadcore works perfectlyand the colours match almost any types of surface that you will be fishing. |
|
|
Lead |
Depending on the distance that needs to be cast a weight between 1 and 3oz will work perfectly. The longer the cast the heavier the weight but don't over do it either. |
|
|
Buffer Beads |
|
|
|
Rig Rings |
Size 3 or Small depending on the brand. |
|
|
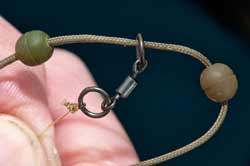
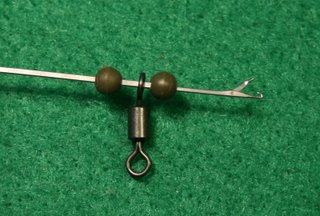
Flexi Ring Swivel |
Size 11 or 12. This swivel will be used for the Chod to be able to run along the Leadcore without getting stuck. |
|
|
Speed Links, Q-Rings or Easi Clips |
These will be used to attache the Lead to the Leadcore Leader. |
|
|
Lighter |
|
|
|
Bait Needle |
|
|
|
Tension Bar/Loop Puller |
|
|
|
Bait Bands |
|
|
|
Silicone Tubing |
0.75mm in Diameter and 5mm Long. |
How to tie a Chod Rig.
Lewis Read shows you step-by-step how to make your very own Chod Rigs.
First off, where will you be using the Chod? Chod Rigs mainly get used where you either have a lot of silt on the bottom or there is some grass or weeds. The reason you use Chod Rigs are because the Chod Rig allows you to present your bait above the silt or the weeds in order for the carp to be able to clearly see your bait. In others words, if the weed or debris is a couple of feet deep, then allowing a travel distance of several feet ensures that, by the time the lead comes to rest, the rig will be able to settle on top, allowing for a perfect presentation. It is pointless having the perfect bait but it is hidden among weeds and underneath a lot of silt.
1: Thread a Choddy hook onto the stiff link Mono or Bristle Filament that you plan on using.
2: Begin to whip the knotless knot, away from the eye closure.
3: Finish up the knotless knot. About 5 or 6 turns will be enough. As seen in the video a whipping knot can also be used instead of the knotless knot.
4: Pop a rig ring onto the tag that projects up from the knot.
5: Poke the tag through the eye of the hook and trim off the excess.
6: Blob the tag end to secure the D rig arrangement. Hold the part that needs to be blobbed between your thumb and your index finger with nails pointing towards the flame. This way you protect the line from getting burnt. Before the blob cools down wet your finger with some saliva and press the blob a little bit flat.
7: Use the tapered end of a Chod-It tool to create a teardrop-shaped D. A Tension Bar/Loop Puller can also be used as long as it is strong and small enough to fit into the D section.
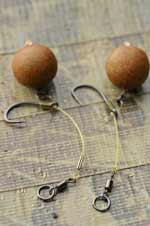
8: Your chod rigs should now be looking like this.
9: Tie a size-11 ring swivel or Flexi Ring Swivel onto the other end using a two-turn blood knot.
Add a drop of Gardner's Rig Glue to stop it moving or undoing itself.
10: Straighten the link between two Chod-It tools or two Tension Bar/Loop Pullers.
11: Snip off the tag from the swivel and blob just like you did in the previous steps.
12: Mold some Tungsten Putty around the top eye of the swivel. This will help give the Chod a little extra weight to pull the Pop-Up down to the ground.
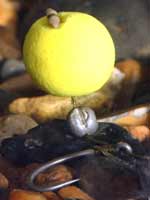
13: Tie your chosen pop-up onto the rig ring and blob the floss tags. When tying the Pop-Up always make sure that the Pop-Up is tied tightly so that it doesn't come loose during the cast.
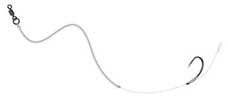
14: That's the Chod tied.
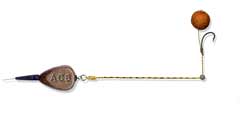
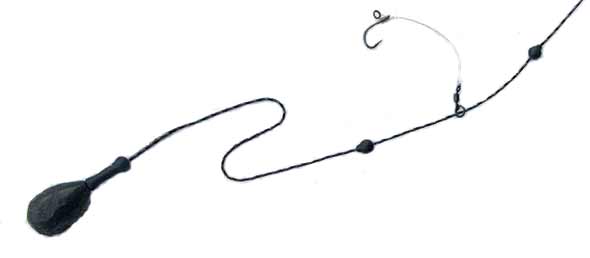
The next step is to attach the Chod to a Helicopter Rig. You can use Pre-Spliced Leadcore Leaders and Helicopter Rig Kits or you can make your own.
If you have not spliced Leadcore before or would like to have a refresher course then please follow this link.
If you want to find out how to make a Helicopter Rig or need a refresh then please follow this link.
Next
Finally attach a Bait Band to the Rig Ring on the Hook, Rig your Pop-Up on to the Bait Band using a Bait Stop and you are ready to go.
Final Points on the Chod Rig
By keeping a steady curve in the rig instead of a more more aggressive curve, then even if the carp are approaching the rig from a fairly high position in the water, the rig is free to enter the mouth unobstructed and hopefully find a secure hook hold.
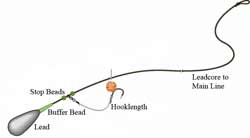
The length of ‘travel’ that the rig is allowed is determined by the placement of beads on the leadcore. Put simply, the higher the top bead, the further the rig is free to travel up the leader. If the weed or debris you are fishing in is a couple of feet deep, then allowing a travel distance of several feet ensures that, by the time the lead comes to rest, the rig will be able to settle on top, allowing for a perfect presentation. Simple enough in theory, but exactly where to position the top bead is not completely determined by this.
Even when casting onto a fairly even bottom with just a low level of debris, you may still set the top bead several feet up the leader. Why? Well, by doing this you almost completely take the lead out of the equation. This eliminates the chance of the carp using the weight of the lead to help in shaking the hook.
Anyone who has witnessed the success of an angler using very light leads, when the norm is a lead in excess of 3.5oz, will know exactly how big an edge this can prove to be at times. The trade-off is of course lessening the pricking potential of the rig in the first place, so unless forced to because of the nature of the lakebed, this is not a decision to take lightly. Like so many things in carp angling it’s a balancing act.
By positioning the top bead much closer to the lead, which is how the chod rig originally appeared, you bring the weight of the lead into the equation almost instantly.
For cleaner bottoms this setup has proved very effective and the mechanics of the rig work very similar to that of another classic, the hinged stiff rig. Unlike the hinged stiff however, which incorporates a stiff boom section, using chod rigs in this way ensures a perfectly presented pop-up section without the worry of the boom section lying awkwardly, having landed on some form of debris. When using the rig in this way, you should generally prefer a shorter hook section working on the theory that you tend to be fishing a more defined spot and baiting more accurately. This in turn should mean the carp are moving around the area closer to the bottom and able to the view the baiting scenario more clearly. A high pop-up in these situations can be just a bit too blatant.
