Tackle Required:
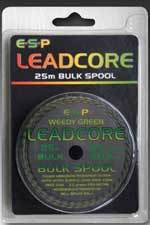
Desired Hook Link Material |
You will need about 30cm to make this rig. If you are using a coated braid strip awaay about 10cm of the coating to use on the hair part. |
|
|
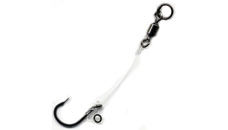
Kurve Shank Hook |
The Gardner Mugga hooks work well for this rig or any curved hooks. Use a Size 8 or 10 hook as the Pop-Ups you will use will be between 10mm and 12mm. Through lots of trial-and-error and testing id was found that curved hook patterns work the best with KD Rigs. |
|
|
| Splitshots |
Will be used to weigh the Hook and Pop-Up down. Dinsmores has a good selection of Splitshots available. |
|
|
Bait Stop |
|
|
|
10mm - 12mm Pop-Up |
Any flavour will do as you only need the Pop-Up to get the right length when tying the KD Rig. |
|
|
Baiting Needle |
|
Learn How to make the KD Rig.
Ali Hamadi gives step-by-step instructions on how to tie the very successful KD Rig.
The KD Rig gets used by a lot of great anglers to catch those wary carp that feed with a little more caution and also due to the magnificent hook holds that this rig creates. The hook is tied on at an aggressive angle making it almost impossible for the carp to eject when sucked in. With the way that the hair sticks out of the back of the hook’s eye, you’re causing the tip of the hook to weigh more, allowing it to grab on a lot faster to the bottom lip of the carp, unlike many other rigs out there.
1: Create a hair in the Hooklink Material by tying a simple overhand knot.
2: Push a 10mm or 12mm Pop-Up onto a fine Baiting Needle.
3: Place the hair into the clasp and begin to slide the Pop-Up on to the hair.
4: Fix the Pop-Up in place with a Bait Stop. This prevents it from falling off the hair when you are working with it.
5: Measure the length of the hair against the bend of the hook.
Let it stop parallel to the top of the hook.
6: Now wrap your hook link material round the shank of your hook and the hair twice, just like you would at the start of a knotless knot.
7: After 2 wraps pull the hair away and carry on for a further 5 wraps around the shank of the hook.
8: Then, thread the tag end of your hook link back through the back of the eye, the side where your bait is, and pull it tight.
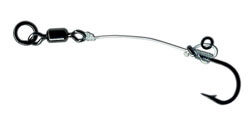
9: Your rig is nearly complete and will be looking like the rig in the image.
10: Make sure you have a selection of shots with you. Different pop-ups have varied buoyancy's so different weights will be needed.
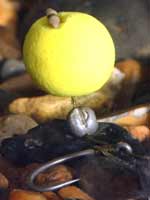
11: Squeeze your shot onto the hair as shown into the picture. At this point is important to check your rig in the water and make sure your chosen shot is sufficient enough to hold your pop-up down.
12: Now tie a Link Loop or any other method that you choose to the opposing end of the hooklength to allow the quick change of the rig.
Add a drop of Gardner's rig glue to stop the knot from moving or undoing itself.
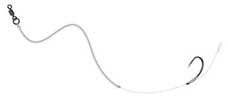
13: Your rig will now be looking like this if tied correctly.
14: Your pop-up will then waft freely above the split shot which is anchoring it in place. notice how the hook should be sitting flat.
Final Points on the KD Rig
The KD Rig works best when it is used with a slow-sinking hook bait. You can do this by drilling a hole into a bottom bait and adding a cork stick or by adding a split shot directly on to the hair. Both are just as good. Many anglers here at Korda also place cork inside a bottom bait to create what is known as the ‘muzza’.
This is not a rig to try if the bottom you are fishing over is full of debris and muck. However if the bottom is relatively free then this is the rig for you.
If you are interested in making your own KD Rigs then you can buy all the needed material (Hooks, Splitshots etc.) from this webpage.
The Carp Fishing Secrets Ebook is probably the most comprehensive guide to carp fishing on the web today! A compilation of some of the best articles we've ever seen from three of the UK's favourite writers.
Buy your copy today!!!!
Alternatively you can download a free sample copy first.
Simply right click the lick and select Save Link As…
