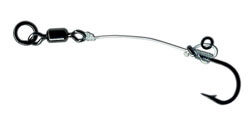
Combi Rig
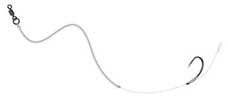
Tackle Required:
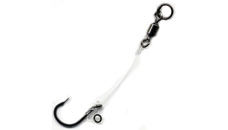
Wide Gape or Curve Shank Hook |
A size 4 to 8 hook is normally the prevered choice but it all depends on the size of the bait that you will be using, bigger baits mean bigger hooks. The Gardner Mugga Hooks work very well with the Combi Rigs. |
|
|
Fluorocarbon or a stiff Monofilament |
20lb to 25lb Breaking strain. The Gardner Mirage or ESP Ghost are two Fluorocarbon lines that work very well especially in very clear water. If you are looking for a Mono line then have a look at Gardner Trick Link or ESP Stiff Rig Bristle Filament. |
|
|
Micro Rig Ring |
|
|
|
Braid |
For the Combi Rig you will need a strong but supple braid. Again look for a breaking strain of 20lb to 25lb. Climax CULT Hunters Braid, ESP Camo Sink Link or Krystons Merlin works great. If you have a coated braid you can also use that as long as you remove the coating first. |
|
|
Shrink Tubing |
Optional |
|
|
Tension Bar/Loop Puller |
|
|
|
Tungsten Putty |
The color you use will depend on what color braid you will be using. |
|
|
Hair stop |
|
|
|
Desired Bait |
Needed to measure the length of the Hair. |
|
|
Bait Needle |
|
| Rig Glue | Gardner Rig Glue. |
How to tie a Combi Rig.
A step-by-step guide teaching you how to tie the Combi Rig by Shaun Harrison, owner of Quest Baits. He also shares some pro tips on improving the rig.
One of the most effective ways of catching carp is by using the Combi Rig, as they can be used on many different types of lake beds.
There are a wide variety of Combi Rigs that can be assembled on the bank while fishing. Stiff length fluorocarbon fishing line, is one of the most common types, with some varieties manufactured from braided material. It's the braided section that it attached to the hook.
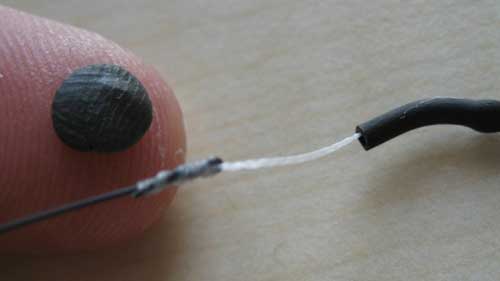
1: Start off by creating a loop in your supple braid using an overhand loop and attach your hook bait using the Baiting Needle. Put on a Bait Stop to keep everything in place.
2: Next attach your hook using a knotless knot. Ensure that the hair is long enough so that the bait hangs past the hook shank - It should not touch the hook shank.
3: Push about 1.5cm of Shrink Tubing right over the knot and the eye of the hook. (This step is optional as it is not needed to add Shrink Tubing for the rig to work).
4: Using steam shrink the tubing down and set the tubing into an angle as it starts to cool.
Always be very careful when working with steam as it can and will burn you really badly if you aren't carefull.
The knot that you now will use (to tie the braid to the Fluoro or Mono) is called an Albright Knot.
5: Take the end of the Fluorocarbon or Monofilament line and bend it into a loop. Try to get the loop to lie as flat as possible to make things easier.
6: Thread the braided line through the loop and position the shrink tubing or the hook eye close to the loop that you just created.
7: Now make 5 turns around the line, over both arms of the loop, going away from the hook.
8: Then make 5 turns back up and over the other turns towards the hook.
9: This step is important as it will cause the line to break your line under pressure if not followed correctly. Push the braided line back through the loop, on exactly the same side, as where it went in when you started the turns. The finished braid section should be at least 5cm long to have adequate movement.
10: Use some saliva to moisten the knot and pull both the hook and tag away from the loop so that the knot tighten completely. Use a Tension Bar/Loop Puller to help pull the knot tight.
11: Trim the tags (both of them) with a sharp pair of scissors leaving a neat little knot. Finish off with a drop of Gardner's Rig Glue to stop it moving or undoing itself.
12: Depending on the color of the braid you are using you can now cover the knot with a bit of Tungsten Putty in the same color. The putty helps to bed everything down nicely.
13: This is how the supple part of the Combi Rig should look.
14: Cut the Fluorocarbon or Monofilament about 25cm from the knot and tie on a Rig Ring.
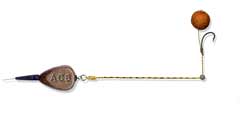
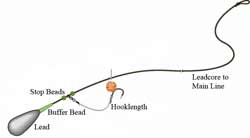
15: And there you have your Combi Rig all done. It's an awesome, subtle presentation.
Final Points on the Combi Rig
One of the best things about fashioning your own Combi-rigs is that the length of the braid is up to you - So you can adapt your rig to the specific fishing situation or acording to the type and size of the baits that you will be using ie. bottom baits, pop-ups or plastic imitation baits.
A soft section of braid (fastened securely to the fluorocarbon with a neat Albright knot), will give the bait a more natural appearance (on the lake-bed), as opposed to looking stiff. At the same time, the shrink tube section will help to flip the hook into a more efficient position.
A fluorocarbon boom will give you a stiff, invisible, anti-tangle line, while a braid grants a more natural moving hook bait.
Fluorocarbon booms have a light refractive index very near to that of water, which assists it in blending in with the water almost perfectly. It also prevents the bait from becoming entangled with the lead during the cast. This creates a more natural presentation and lowers the possibility of troublesome line snagging and by adding tungsten putty or a line sinker you can ensure that the line sits flush to the lake-bed.
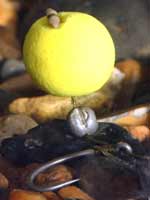
This type of rig is mostly used for a balanced bottom-bait assembly. It also works quite well with imitation tigernuts and/or corn, as the plastic bait pops up on the short supple section.
The entire set-up is balanced with the appropriate split shot or tungsten putty.
It's best to try various combinations until you find one that works out best for you and make sure that if you are using a pop-up bait that you test it first to see that verything is working correctly.
Everything you need to make a Combi Rigs (Hooks, Rig Rings, Shrink Tubing, Bait Needle, Bait Stops) are available from this web page.
The Carp Fishing Secrets Ebook is probably the most comprehensive guide to carp fishing on the web today! A compilation of some of the best articles we've ever seen from three of the UK's favourite writers.
Buy your copy today!!!!
Alternatively you can download a free sample copy first.
Simply right click the lick and select Save Link As…
